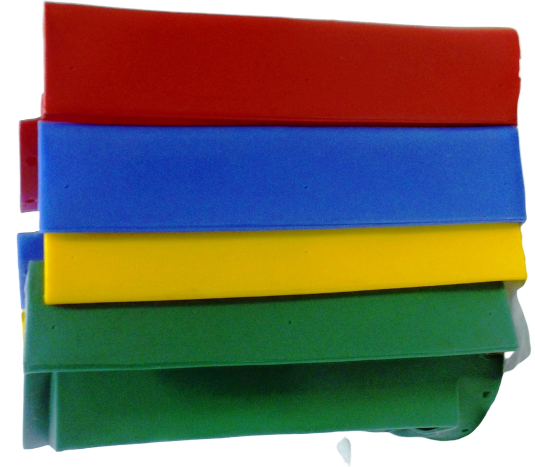

We offer a rotational molded polyethylene scoop slide that is designed to be conveniently shipped via UPS. This slide consists of entrance and exit sections, each measuring 3 feet in length, and features a 16-inch seat and a 23-inch overall width. Additionally, the slide includes handrails that are 9 inches in size. To provide proper support, two sections of 2x4s (not included) are required under the handrails. This product has a weight limit of 300 lbs and should last up to 5 years in optimal conditions, although harsh conditions may require earlier replacement.
Platform Height Slide Length Slide + Inserts Screws Sent with Order Slide Dimensions
3’ 6’ 1 + 0 6 hex – 14 pan 72 x 21.75 x 12
4’ 8’ 1 + 1 11 hex – 21 pan 96 x 21.75 x 12
5’ 10’ 1 + 2 16 hex – 27 pan 120 x 21.75 x 12
**Installation, Safe Use and Maintenance Instructions**
IMPORTANT: Please read for important information. In this material we have tried to provide some requirements stated in the CPSC Handbooks, ASTM F2373-11, F1487-11 and F1148-09. However, we in no way intend for this to be a complete list of requirements. Also these publications are updated frequently with changes therefore, you should read these publications yourself to determine if any part or installation could prove a danger to a child.
To help keep children safe from harm, review installation and maintenance instructions before installing equipment. These are located in the description of every product on our website. www.americanswing.com Download and print these instructions and keep in a safe place. Our website also has a “Product Testing Information” page. All products are tested for lead, phthalates and tensile strength. You can also call us at 1-800-433-2573 for more information or see http://www.cpsc.gov/cpscpub/pubs/325.pdf.
Due to the thermo dynamics and lower heat transfer properties of plastics, plastic slides are preferred over metal slides for play equipment. Although plastic slides may become as hot as metal, they insulate better and don’t transfer the heat as quickly. Because of these properties, the Consumer Product Safety Commission (CPSC) recommends plastic slides and plastic surfaces over bare metal.
Regardless of lower heat transfer properties, plastic play equipment can still become hot enough ‐in extreme temperatures and direct sunlight ‐to cause burns. Plastic slides are safe, tried and true, but as is the case with all playground equipment, parents and supervisors must monitor the children in their care, make certain that the equipment is appropriate for their age, and always check playground surfaces for excessive heat before allowing children to play. For more information, contact IPEMA headquarters at www.communications@ipema.org or by calling 1‐717‐238‐1744.
WARNING:
Instruct children to never run up the slide and to slide down feet first. Tell children to make sure the bottom of the slide is unobstructed before going down the slide. Do not use slide when wet. Do not use equipment until fully assembled. Consider proper drainage and place slide in shaded area or located out of direct sun. Slides exposed to intense sun can burn.
No span of the sliding surface should have a slope that exceeds .577 degrees. Handrails or other means of hand support should be installed at the slide chute entrance to make it easy for children to go from standing to sitting. There should be guard rails to transit the child into the slide chute. The transition platform should be as wide as or wider than the slide entrance.
Installations: Our parts are sold as either replacement parts or components of a set, unless you are buying our Metal Frame Set, therefore these parts need to be installed according to the sets installation instructions. If the installation instructions differ from ours please contact us at 1-800-433-2573.
Place all sections of the slide upside down on a flat surface. Fit each section together as tight as possible. Center the pieces. Screw one #12 x 1” hex head screw through the center of each piece which will connect the slide together, but allow you to work with the slide to align the pieces. Put a 2 x 4 under the slide one side at a time. There are 6 – #14 x 1 ½ pan head screws. 3 go on each side of the insert. Make sure parts are aligned before the screws are inserted. Start at one end where the two sections meet together. After screwing in the screw closest to the edges of the sections, then put the middle screw in the side. Add another section, making sure that it is aligned before inserting the screw. Make sure the screws are screwed into the wood straight and not crooked. Now, put the other 2 x 4 under the other side and repeat the process. When last section is screwed together, using the hex head screws, finish screwing the bottom part of the sections together.
Mount the slide to your platform using 2 – #14 x 1 ½ pan head screw, making sure the heads are smooth so that they do not harm the children. Place a 16” x 16”, or larger, stepping stone flush with the ground for the base of the slide to set on. The brick should be level and square to the slide. This is to keep the slide height stable. If the slide keeps sinking into the dirt, it will put stress on the screw holes attaching the pieces together. Also, make sure that the slide is not lifted off the ground after attaching to the platform. Lifting will put stress on the mounting screw holes. Any small gaps on the sides can be filled with silicone sealant. Fill, smooth, and let dry. This will prevent any gaps in which small finger could get caught. If properly aligned, there should be very few small gaps.
Safe Use: This is for children 2 – 12 years old only. Adults should supervise children at all times. Do not allow children to stand on or use unsafely. Do not allow it to be used if damaged. Instruct children to never run up the slide and to slide down feet first.
Maintenance: At beginning and end of each play season and once a month during play season, check for cracks in plastic, paying particular attention to the top of slide where attached to platform. Check for rusty screws, missing or loose hardware or evidence of vandalism. Check for cracks in wood or splinters. Replace parts as necessary. Make sure there are no exposed footings, anchoring devices, rocks, roots, holes or any other obstacles in or around the slide. Maintain detailed inspection and maintenance records for public-use playground equipment.
Any damage from vandalism, abuse or misuse VOIDS all warranties.
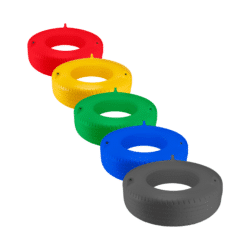
Colors: Blue, Green, Red, and Yellow
SKU#SCOOP6